Module
One:
Expectations: By the end of these steps you should have
completed a basic edit, exported your first video, uploaded it to Media Space, and shared your link and embed code to the discussion forum..
At
Home: Steps one through seven
you will complete on Adobe Premiere outside of class. You have access to Adobe Premiere CC in the
FRCs or Digital Labs. If you have any
questions the class has a discussion board for issues and concerns or you can
email me.
In Class: We will get everyone caught up on steps one through seven. We will share some work and get everyone to where they can paste their link and embed code into the discussion forum for module one.
Week
One: Assignment One:
Day
One:
Step One: Go to Introduction to Adobe Premiere Pro and click on Basic workflow and read that section. You are welcome to read additional topics. Step Two: Review
Adobe’s Introduction videos page on Premier. Click
on the link. It will take you to a Premiere introduction page on Adobe's website. Click on "Get Started". If you have a license you can download Premiere here. If not please use the digital labs or FRC on each campus. Follow along in Premiere as you watch the first two videos in the section under Essentials for beginners: Create a Project and Explore Premiere Pro Panels. By following the steps in these videos you will build your project file this week. The videos will take you step by step. Step Three: Get files to edit with in the section “How
to create a project and import a clip” (Note: You may have downloaded these when going through Step Two)
Go to the section: Under
the title “WHAT YOU’LL NEED”. You will see a “Get
Files” button. Double
click on that (or the link provided in this step) and download the zip file. Extract that folder.
Time: 10 minutes
Time: 35 minutes.
Save the files to a usb 2.0 (or better) flash drive that is 8gb or larger (see course materials). You will save all your files to this flash drive (including your Premiere proj file) and bring it to class each week.
Your project file and these files you extract from the zip are the only files you will need for this class assignment.
You are welcome to use your own video files from lecture, family trip
etc. If you are struggling with these steps please use the ones provided in “Get Files”.
Day
Two:
Step Four: Use Premiere. You've watched the videos and now is your time to use Premiere and edit on your own before coming to class on Friday.
Please open Adobe Premiere and follow the training video Learn Editing Skills.
Use the files you have downloaded in Step Three and remember to save your project file to your thumb drive as you will need it for the live session. (NOTE: If you are in the FRC or one of the
digital labs you are required to use headphones.)
Time: 60 minutes
Step Five: Exporting your work as a movie. Export your sequence you created in Step Four and make sure you save the file to your thumb drive. Your work doesn't need to be complete or perfect. We will refine things in class. Follow the instructions in this video link here.
Feel free to follow the OPTIONAL instructions. NOTE: Media Space converts the file so all of these export options are acceptable. Try not to get too worried about the settings and all the menus inside menus. It can be overwhelming.
OPTIONAL: In your export settings, instead of using "match bit rate", I want you to scroll down to YouTube 1080p.You are welcome to watch this video and do it this way.OPTIONAL: If you are on a MAC and want to export it as a YouTube friendly file you can watch the video below.Click here if the player below doesn't load.
WARNING: you can spend hours messing around with export setting and windows. Most importantly mark in at the begginning of your project and end.
Time: 10 minutes.
Step Six: Upload the movie you exported in step five to Media Space. Media Space is like YouTube. It is provided free to all employees by the College. If you are struggling with the other steps this step can be done in class.
Media Space is available to all employees
through Artemis.
First: login to Artemis 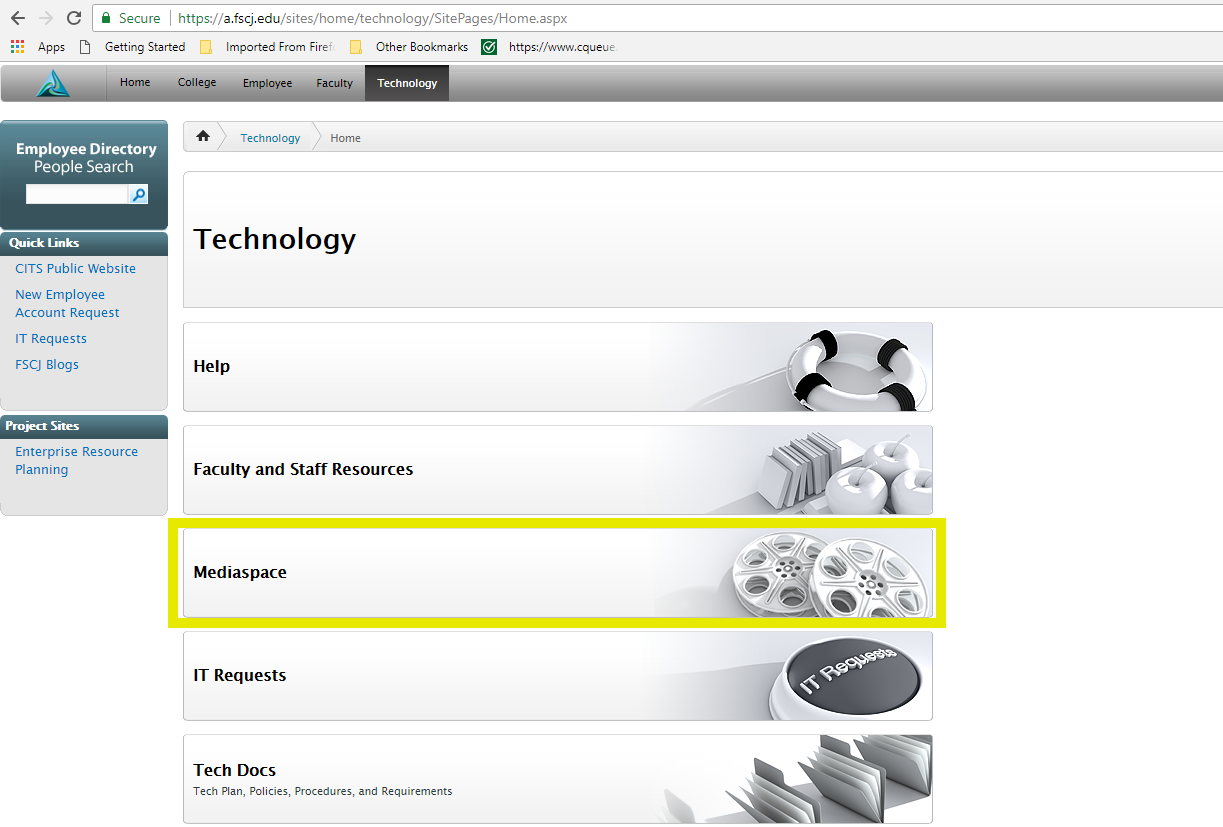
Then click on the “Technology” tab at the top. After the page loads, double click on “Media Space tab in middle of the screen”. On the
next page, in the top right corner, click on the + or “ADD NEW”. Click on the “media upload” from the drop
down.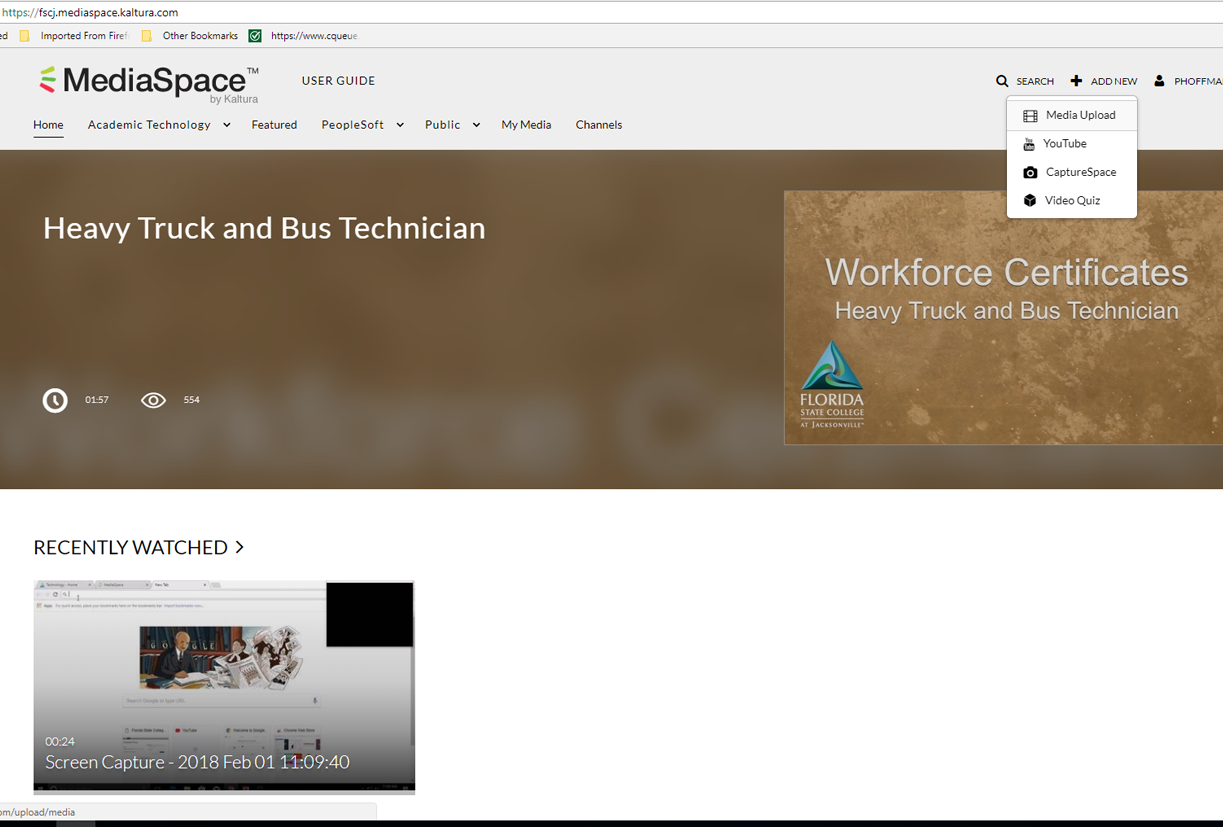
Then
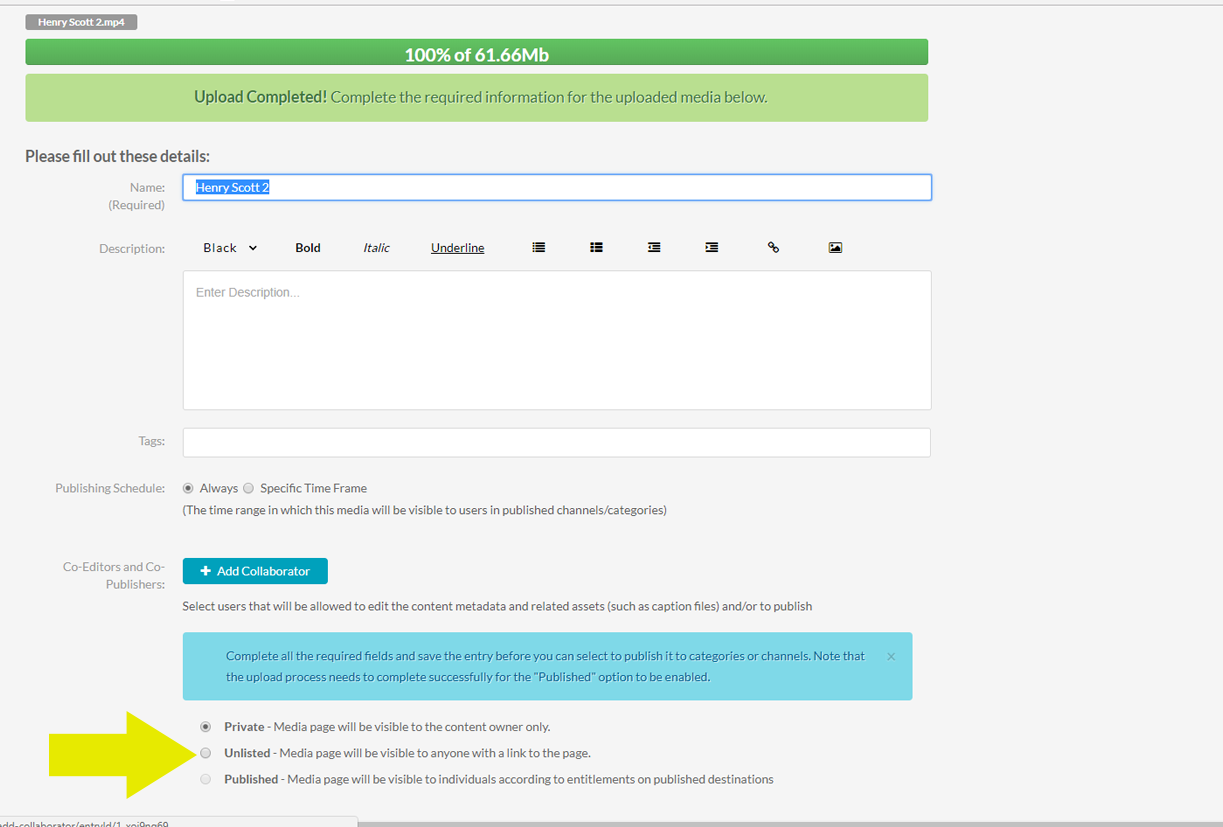
double click on “choose a file to upload”.
Find where you saved your export video file (hopefully on your thumb drive) and click okay. You’ll see an upload interface. For now, ignore all the settings except "privacy". Set privacy to "unlisted" and click
save.
Step Seven: Take this fun quiz to test yourself and reinforce what you've learned.
Day
Three: Agenda (Live Session)
1: Introductions. While logging into the computers and launching Premiere, we will go around the class and each person will mention one reason they want to learn Adobe
Premiere.
Time: 10 minutes
2: Review projects. Students will load their
projects from files on their thumb drives. The Instructor will go student to student to see where they are while students begin work on step 3.
Time: 30 minutes
3: Share links. The following instructions and animated Gif will be on the screen to follow. Link to instructions on sharing. Students will share the link to their videos and provide embed code in the class Module One: discussion forum in Blackboard.
Time: Step 2.
4:
Review and peer assistance. Instructor provides a general overview of sharing links and allows for peer to peer assistance with questions. Instructor reviews discussion forum and helps anyone who can't share their link.
Time: 10 minutes
5:
Show peer work. Allow for volunteers to share 2 or 3 videos.
Time: 5-10 minutes
6:
Introduce assignment for next week: Module two: adding graphics and titles – Class ends.
Time: 5-10 minutes
Total Time: 65 minutes
Module One: Rubric
Click here to get the rubric for this assignment.
Reminder: it will not be graded but this is a guide to help you.
Additional
resources:
This is a good overview video (don’t watch until you’ve tried the steps above).